In the dynamic world of *Monster Hunter Wilds*, victory isn't solely determined by brute strength. Speed and strategic positioning can be just as crucial, especially when wielding the versatile Dual Blades. These weapons are renowned for their rapid strikes and ability to hit multiple times in quick succession, making them ideal for hunters who thrive on agility and precision. Here's how to maximize the potential of Dual Blades in *Monster Hunter Wilds*.
Dual Blades in Monster Hunter Wilds
The Dual Blades are a testament to speed and versatility, allowing hunters to unleash a flurry of attacks that can overwhelm even the most formidable monsters. Mastering both its modes is essential for adapting to various combat scenarios effectively.
All Moves
| Command | Move | Description |
|---|---|---|
| Triangle/Y | Double Slash/Circle Slash | Initiate your combo with a Double Slash by pressing Triangle/Y, followed by another Triangle/Y for a Circle Slash. |
| Circle/B | Lunging Strike/Roundslash | Advance with a slashing attack using Circle/B, and press again for a Roundslash. |
| R2/RT | Demon Mode | Activate Demon Mode to enhance attack, movement speed, and evasion, while gaining immunity to knockbacks. |
| Triangle/Y + Circle/B (In Demon Mode) | Blade Dance I, II, III | Chain these powerful attacks in Demon Mode, consuming the Demon Gauge. |
| Triangle/Y + Circle/B (In Archdemon Mode) | Demon Flurry I, II | Unleash a series of attacks in Archdemon Mode, consuming the Demon Gauge. Control the direction with the analog stick. |
| Cross/A (During Demon/Archdemon Mode) | Demon Dodge | Execute a faster dodge in Demon or Archdemon Mode. A Perfect Evade allows attacking while dodging and provides a short-term buff. Demon Dodge does not consume the Demon Gauge in Demon Mode. |
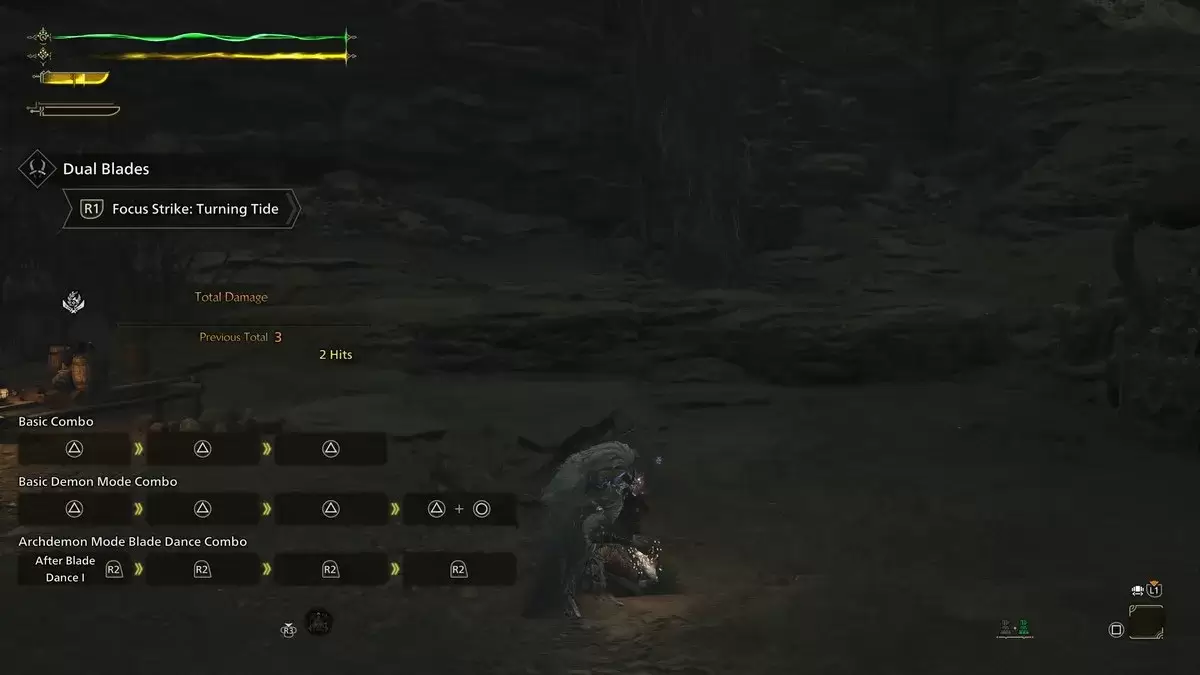
| L2/LT + R1/RB | Focus Strike: Turning Tide | Perform a slashing attack effective against wounds. Hitting a monster's wound triggers a Midair Spinning Blade Dance, capable of destroying multiple wounds across the monster's length. |
Demon Mode/Demon Gauge and Archdemon Mode
The Dual Blades feature a unique Demon Gauge mechanic. Entering Demon Mode boosts your attack, movement speed, and evasion, granting knockback immunity. However, it continuously depletes your stamina, ending when stamina runs out or manually canceled. Successfully landing attacks in Demon Mode fills the Demon Gauge, and once full, you transition to Archdemon Mode. In Archdemon Mode, the Demon Gauge decreases over time and is consumed by certain attacks, enabling powerful, boosted attacks.
Both modes can be utilized simultaneously, and when mounted on a monster, the Demon Gauge stops decreasing, providing a strategic advantage as you plan your next move.
Demon Dodge
After a successful Perfect Evade, enter an empowered state with Demon Dodge, which increases regular and elemental damage and allows attacks during dodging. Demon Dodge provides a 12-second damage buff, and subsequent dodges cause damage as you spin forward.
Combos
The Dual Blades' combos revolve around Demon and Archdemon Modes, and understanding how to chain attacks is key to maximizing damage.
Basic Combo
Start with three consecutive Triangle/Y attacks to execute a Double Slash, Double Slash Return Stroke, and Circle Slash, delivering reliable damage in various hunting scenarios. Alternatively, use the Circle/B Demon Flurry Rush – Spinning Slash – Double Roundslash combo to quickly fill your Demon Gauge.
Demon Mode Basic Combo
In Demon Mode, your basic combo becomes more potent and faster. Begin with Demon Fangs, followed by Twofold Demon Slash, Sixfold Demon Slash, and conclude with Triangle/Y + Circle/B for Demon Flurry I.
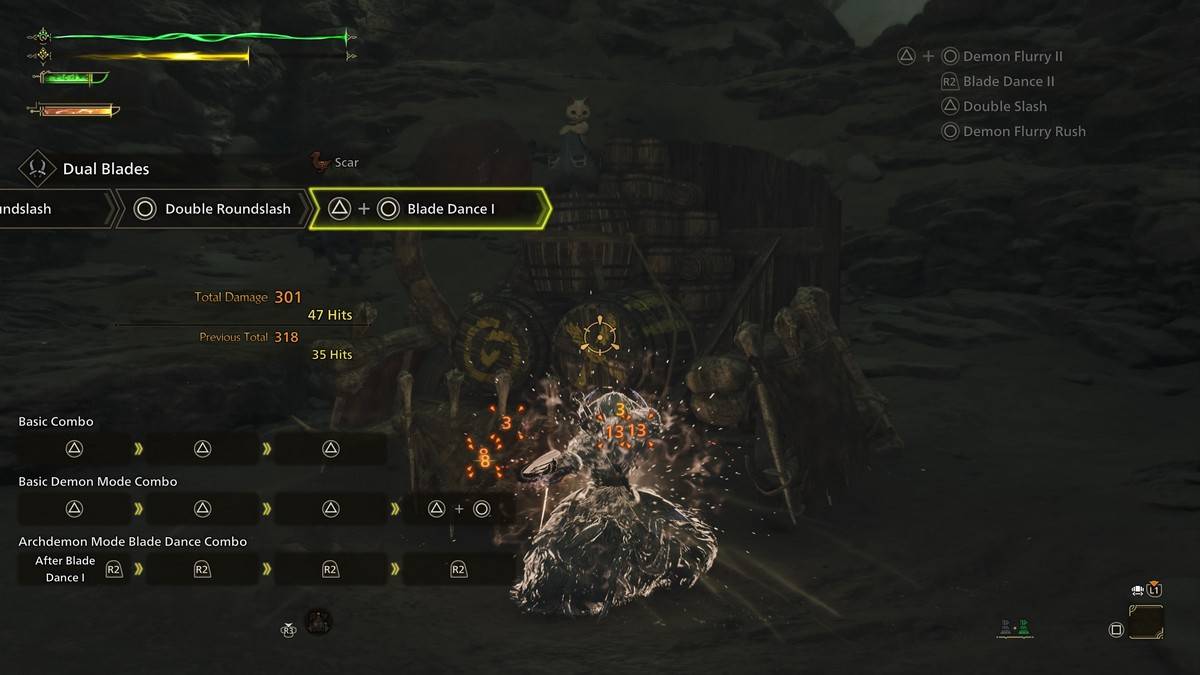
Archdemon Mode Blade Dance Combo
Once the Demon Gauge is full, enter Archdemon Mode for swift, concentrated attacks. Start with Blade Dance (Triangle/Y + Circle/B) in Demon Mode, then press R2/RT four times for Demon Flurry I into Blade Dance II, and finish with Demon Flurry II and Blade Dance III. This seamless transition between modes delivers significant damage quickly.
Dual Blade Tips
Mastering the Dual Blades involves fluidly transitioning between Demon and Archdemon Modes, maximizing damage output.
Always Follow Up
Initiate with the basic Demon Flurry Rush combo (Circle/B + Circle/B + Circle/B), then seamlessly transition into a full Demon or Archdemon Mode combo with three sets of Triangle/Y + Circle/B. This strategy quickly fills and utilizes the Demon Gauge for rapid damage, a feat unmatched by weapons like the Great Sword.
Keep Your Stamina Up
Demon Mode relies on stamina, so maintaining reserves is crucial. While you can exit the mode to recover, using Focus Strike on wounds can halt stamina drain during the attack and still fill the Demon Gauge, preparing you for more aggressive assaults upon landing.
Dodging in Between Attacks
Without a reliable defense, dodging is your lifeline. The Dual Blades offer superior mobility, allowing you to dodge out of most attacks and combos. Avoid overcommitting and wait for the right moment to strike, leveraging the quick animations to your advantage.
Ensure Sharpness
The relentless attacks of the Dual Blades can quickly dull your weapons. Utilize the Speed Sharpening skill in your build to minimize downtime and swiftly return to the fray.
Mastering the Dual Blades in *Monster Hunter Wilds* requires a blend of speed, strategy, and stamina management. For more tips and guides, be sure to visit The Escapist.
*Monster Hunter Wilds is available now on PlayStation, Xbox, and PC.*